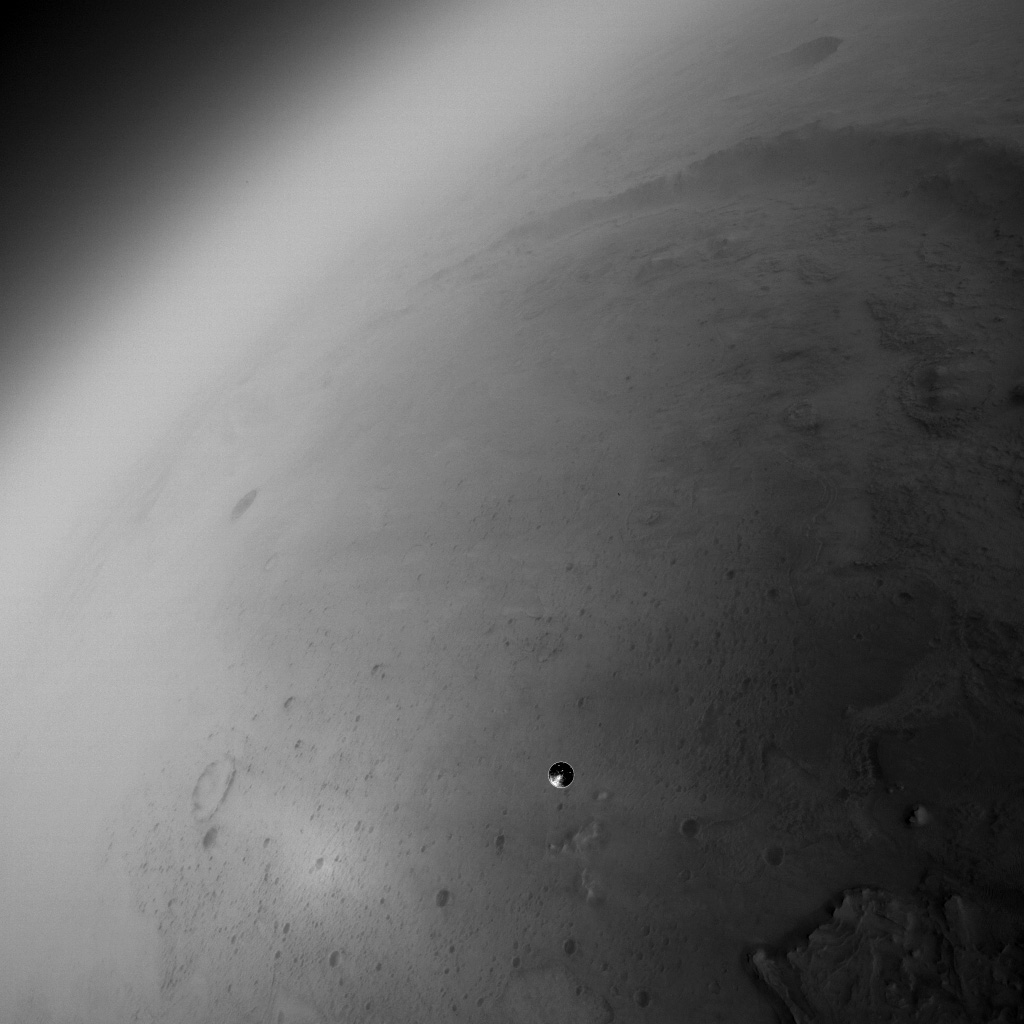
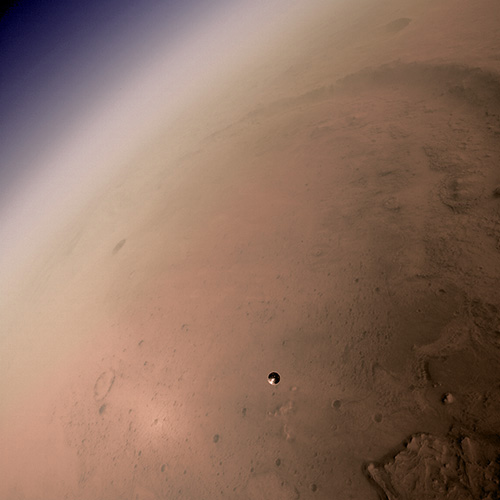
On February 18, 2021, the Perseverance rover completed perhaps the best documented landing on another world. The landing system contained several imaging systems that returned data to Earth following the landing, including video cameras capturing parachute deployment, navigation to the surface, and deployment of the rover from Skycrane (both from the rover's and Skycrane's point of view). But perhaps the most interesting view (in my opinion, at least) was the widefield terrain imaging produced by the Lander Vision System Camera (LCAM). This camera was perhaps the most important participant in a successful landing, as it compared live images from the descent to an onboard hazard map, helping guide the rover to the safest possible landing spot it could reach. The view of the surface from the Martian middle atmosphere was also incredible.
The sweeping views returned from this camera are incredible in black and white, but how would they look in color? This page documents my process of colorizing the image in Photoshop.
The first step to any colorization project is developing a palette of colors to apply to the image. For that we turn to the color imaging systems that were included on the descent stage. For sky colors, I used imagery from the parachute deployment cameras. For terrain colors, I used imagery from the landing deployment cameras. The far background in the LCAM image includes some lower atmospheric dust haze which is harder to see in the parachute deployment camera, so I used some post-landing photos from MastCam-Z as a color source.
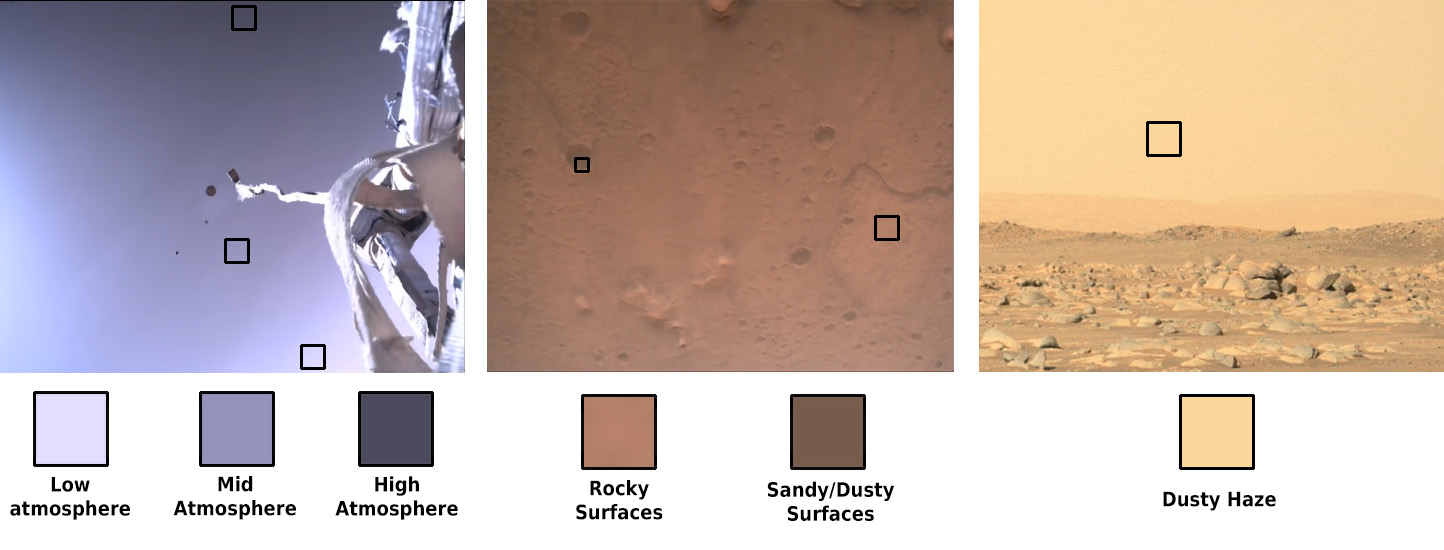
Selecting a color palette in this case is perhaps a little simpler than for colorizing a black and white image on the surface. Most of the rich color variations of rocks on the surface average out, so the surface color basically boils down to how much dark sand is covering a given area. The sky has a relatively smooth color gradient which can be recreated with the gradient tool with only a few colors. And atmospheric haze looks relatively homogeneous from the surface in MastCam.
The first step is to develop some mask layers for the surface so that we don't have to hand-paint individual features. An observation that helps us out here is that the large-scale brightness variations in the LCAM photo generally correspond to color variations in the landing video. Light brown rocky areas in the landing video are bright, dark-brown sanding areas are dark.
What I want to do is isolate those brightness variations. First, I need to deal with a brightness gradient in the surface lighting. Locations along the right side of the image are darker than locations with the same color to the right. If I apply a naive brightness mask by saying "everything brighter than X value is colored this way", I'll introduce a color gradient that doesn't exist in reality.
To remove this, I'll model this brightness gradient by applying a gaussian filter that's much larger than any individual terrain features. For this photo, I used a filter width of 85 px. I then darken this filter to prevent it from completely stripping brightness information from darker areas when I subtract it from the original image. Interestingly, I'll note that this basically acts as a dehazing filter closer to the horizon, and makes some of the more distant landscapes a little more visible! I'll come back to this at the end when I identify some surface features.
Now I will to create two layers with the color blending mode. One of these layers will have an opacity mask based on the gradient-subtracted image I just created. This mask is more opaque where it is darker, and replicates the simple mixing of dark sand/light bedrock we see on the surface in the landing video. The goal is to adjust the contrast of this mask such that we get a decent match to the terrain coloration seen in the landing video.
With that, the surface color is done. Time for the atmosphere.
To colorize the atmosphere, I want to develop a color gradient that we can apply to the atmosphere. This gradient will have a series of colors, going from the deep lavender seen looking upwards out of the atmosphere, to the bright pink of more oblique angles through the atmosphere, and finally to the light yellow-brown of the dusty lower atmosphere. This gradient should also fade out towards the foreground, simply because the camera is looking through less atmosphere for nearby objects. Here's what that gradient looks like.

I then applied this to the upper left corner of the image, producing the following image. Note that the sky brightness drops off considerably at the upper right. This is due to a combination of factors. First the LCAM sensor is much less sensitive to blue light, and since the light coming from higher parts of the atmosphere is mostly blue, the brightness fades quickly. (This is similar to how Ansel Adams used yellow filters to create the dark daytime skies in his landscape photos.) This effect is further exacerbated by the contrast stretch applied to the raw image. I'm not sure of a "realistic" correction for this from the raw imagery, so I'll leave it there as an artistic effect.
Almost there!
There are a few small adjustments I still need to make. First, I need to colorize the heat shield! For this, I'm taking a screen grab of the heat shield from the landing video, then scaling and aligning it to the heat shield in the LCAM photo. I then apply this as a color layer. Now that all of the colors I'm using are now present on the image, I make some minor adjustments to hues and tints to make sure that everything blends together nice and seamlessly. Finally, I want to desaturate the colors in the area around the opposition surge. In this area the light is being coherently scattered back towards the observer, and this light contains comparatively little color information relative to the rest of the surface.
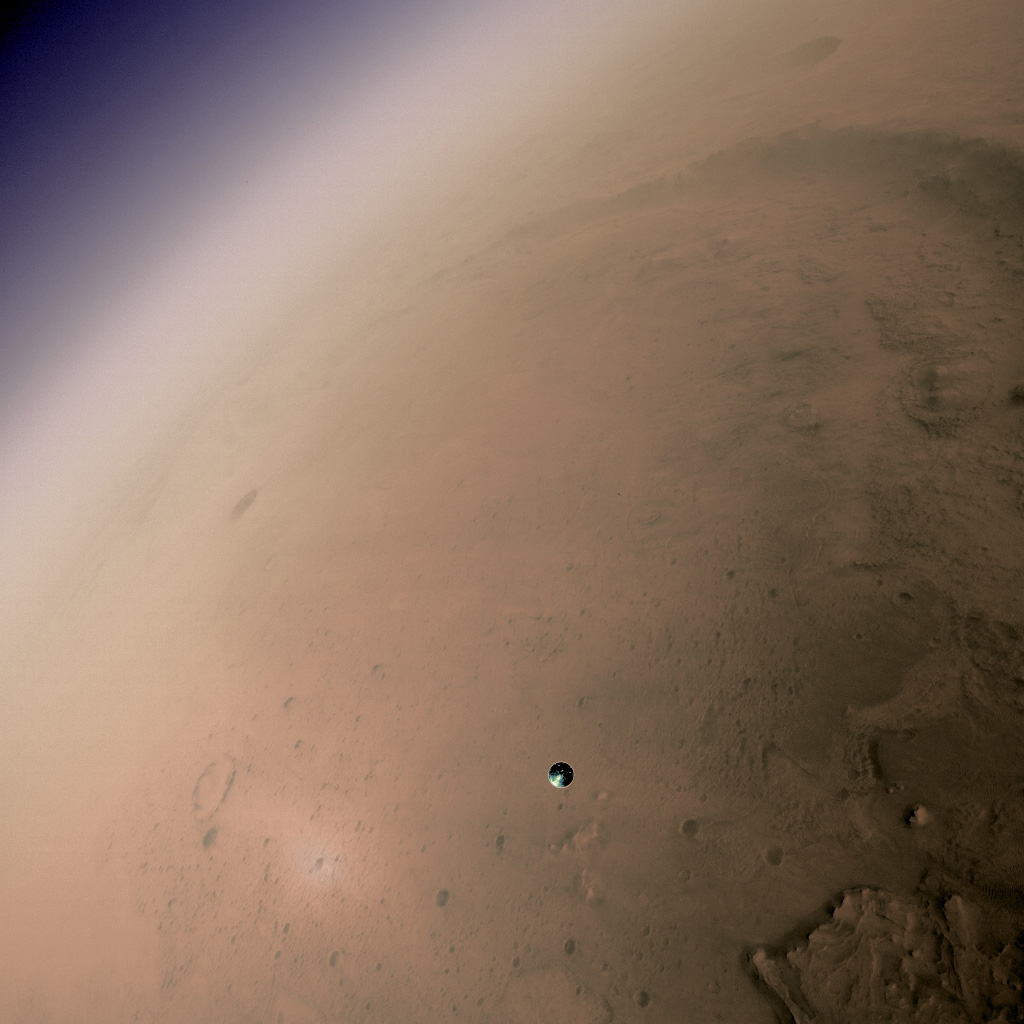
One final thing I would like to deal with is the fisheye distortion created by the camera's wide field of view. This gives the image more of an "out the airplane window" type view. For this I warped the image to remove the curvature from the horizon and middle background objects. The foreground is still distorted a bit because it's looking almost straight down. I also made a few final brightness and contrast adjustments for appearance.
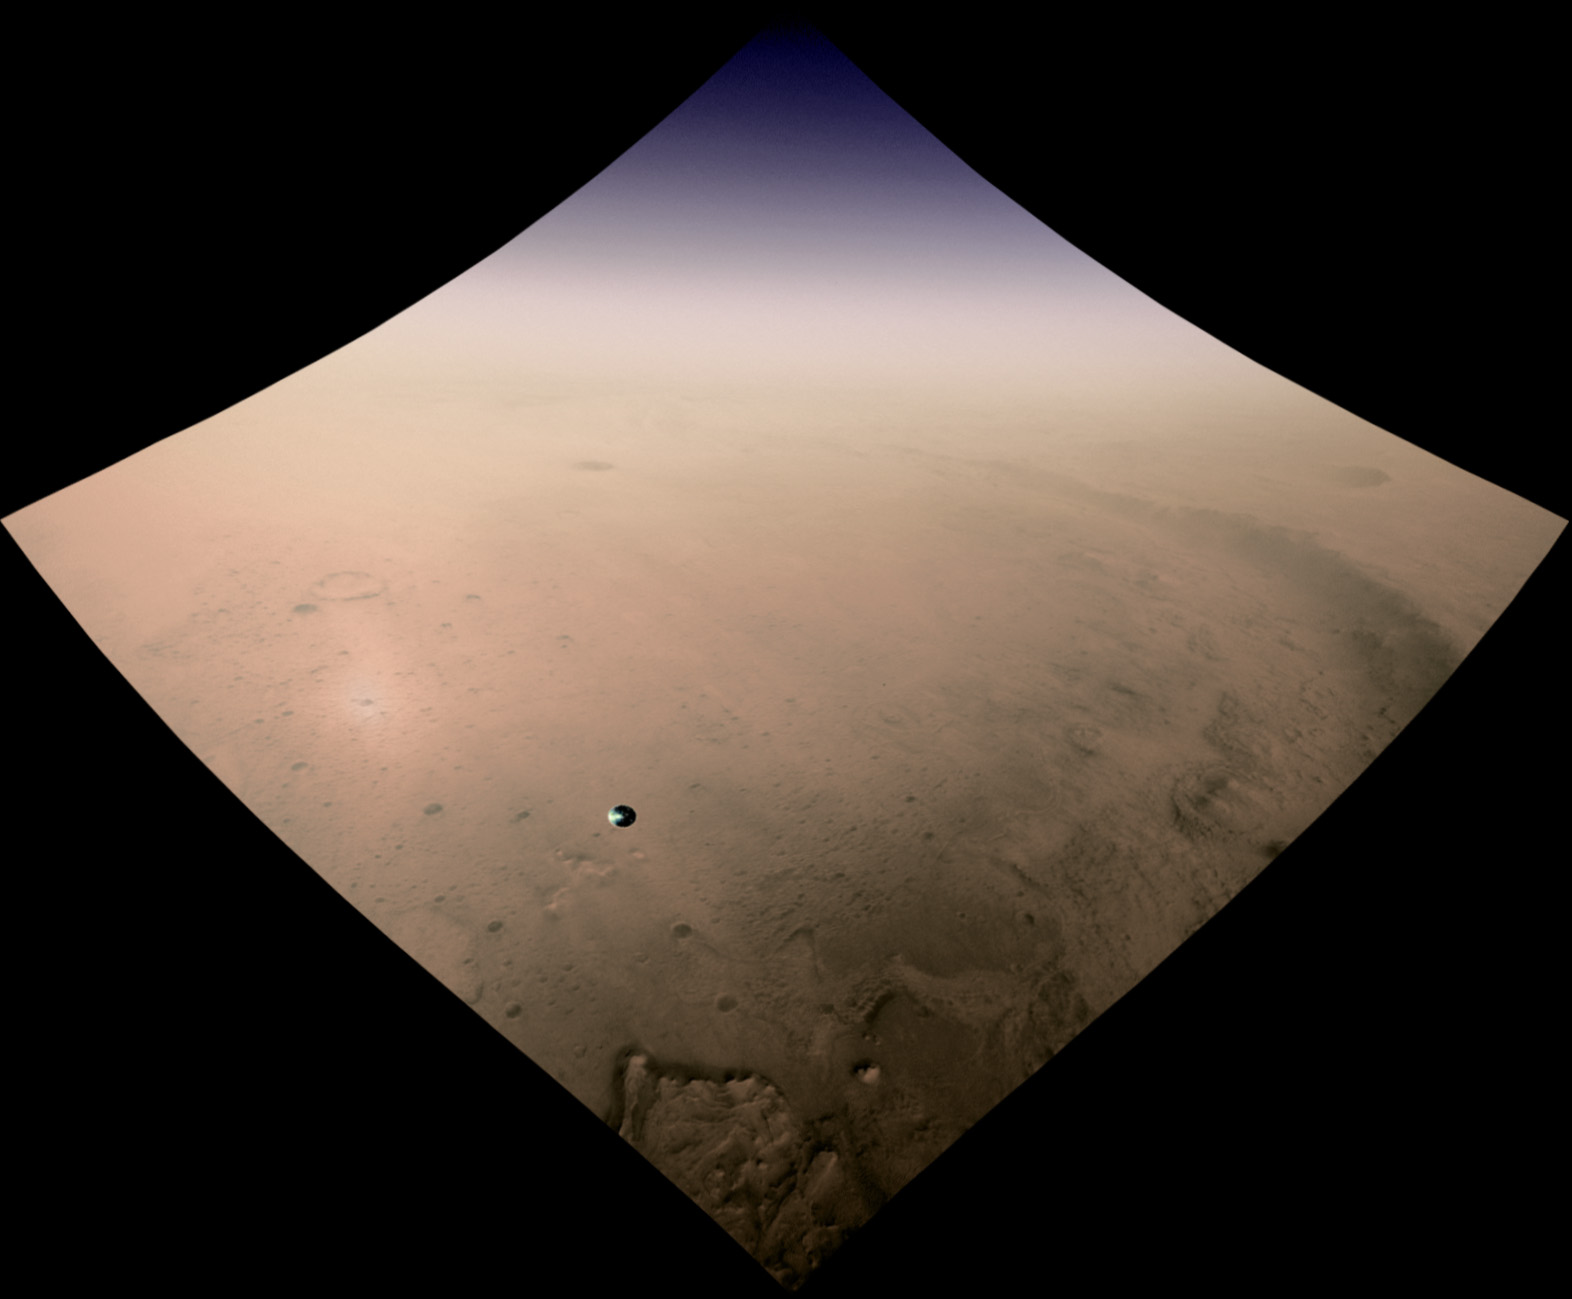
One last thing is to point out some of the landscape features that are present in the image. We have a pretty commanding view of the area! With the assumption that the portion of the delta at bottom center is directly below the lander, we can also judge the distance to some of these landmarks.
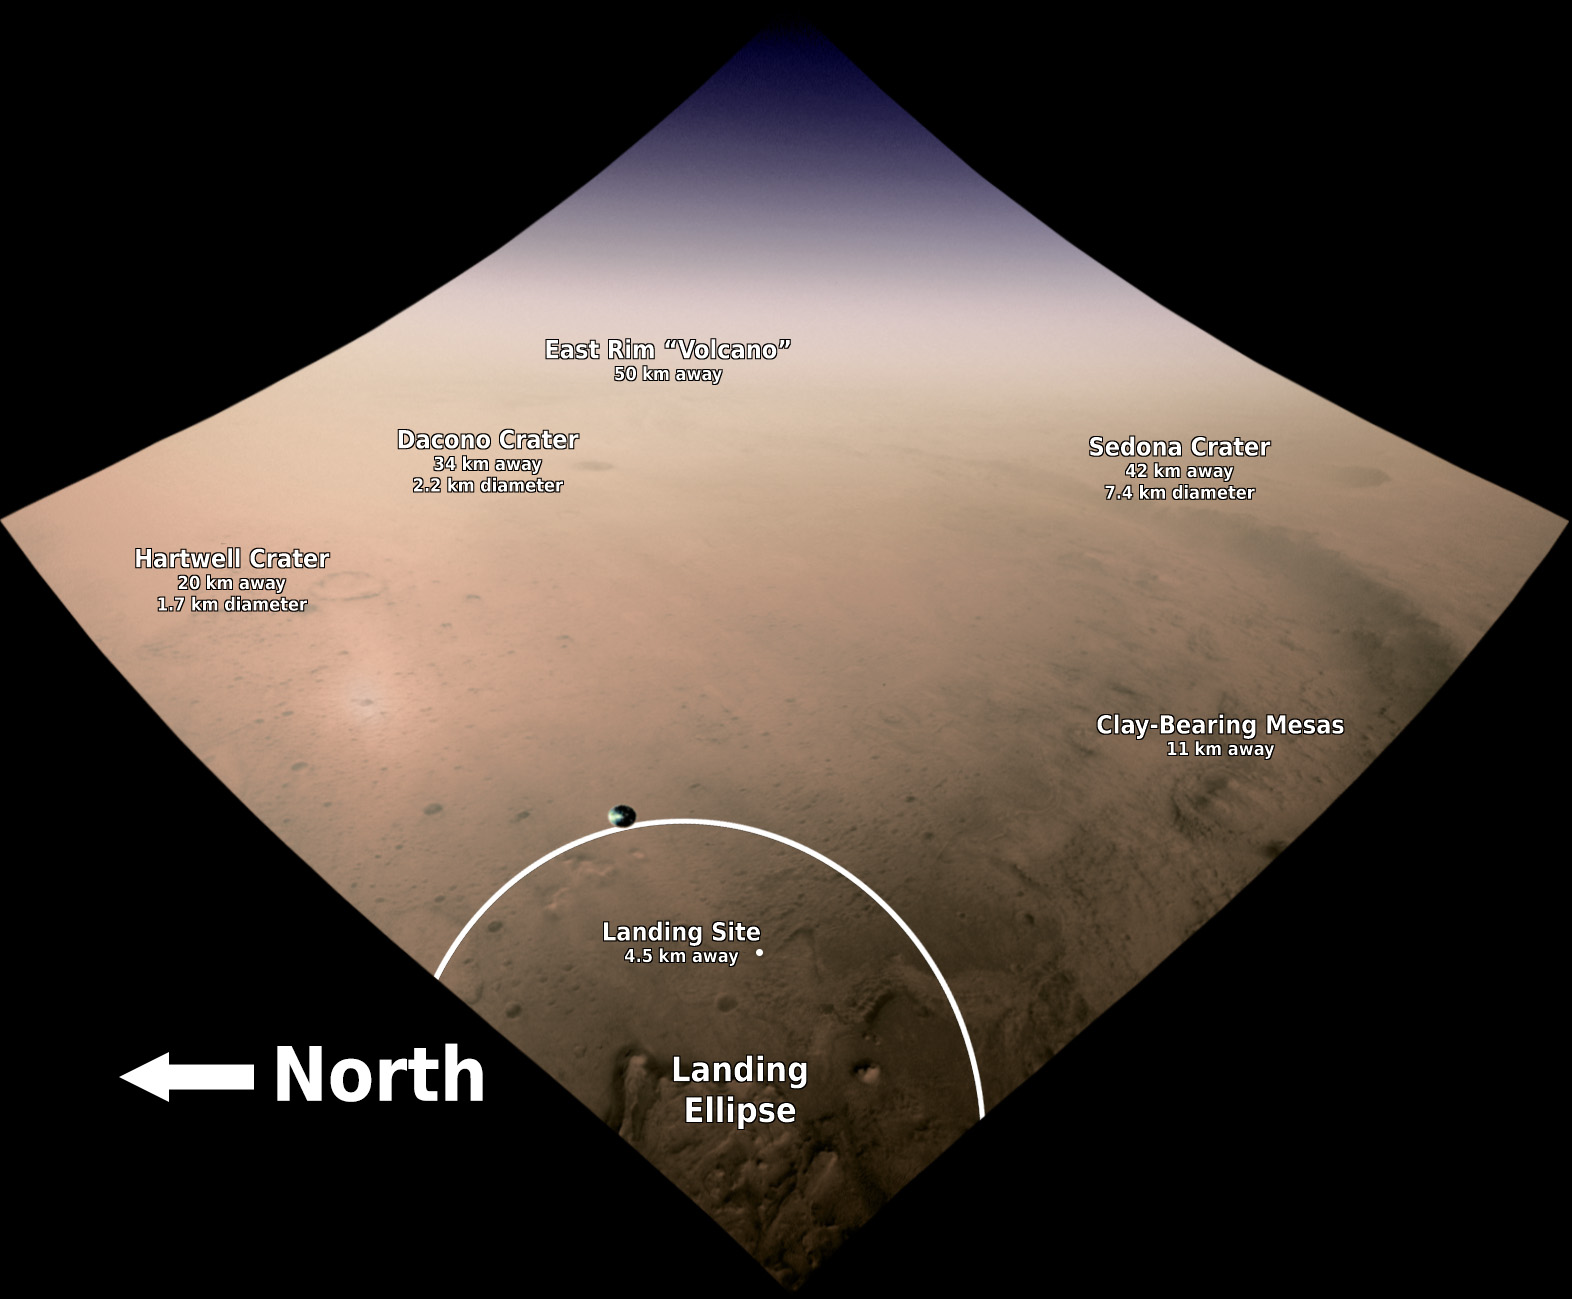
There are very few named craters on the floor of Jezero, since most are inconsequential enough to have not needed a name. The two named craters, Hartwell and Dacono, are what are known as "trap craters". This is a particular kind of landing hazard where the terrain on all sides is steep enough to prevent the rover from safely performing a traverse. A third large trap crater, Belva, is located just out of view on the delta at bottom center. Further in the distance is Sedona Crater, which is of scientific interest because it appears relatively fresh. Rocks ejected from this crater during its formation may be present in Jezero. Finally, in the far distance, near the horizon, is the East Rim "Volcano". It's unclear whether this hill is a true volcano, but it bears a striking resemblance to one. There is also a suspiciously shallow and ragged crater near its summit which looks like it has a non-impact origin, and although the terrain beyond Jezero's eastern rim is extremely hilly, the "volcano" is several times larger than any of them. If it is a volcano, it is possibly related to the volcanic floor unit that Perseverance landed on.
In theory, this is a straight-forward and repeatable process, and it may be possible to colorize the entire landing sequence imaged by LCAM in this way. In practice, consistently applying coloration to these image will likely require x,y,z orientation in Cartesian coordinates embedded in the metadata. Maybe one day, though!
Last Updated: March 10, 2021