This tutorial will provide a walkthrough of applying the image differencing technique for the purpose of enhancing clouds and surface frosts in Mars Express HRSC data. HRSC has nine sensor channels pointed in slightly different directions so that the camera can collect topographic data. Four channels collect color information at blue, green, red, and near infrared wavelengths. Data collected by these channels is commonly compressed and relayed back to Earth at 1/4 or even 1/8 resolution. This data is then upscaled on Earth and applied to a full-resolution panchromatic image (taken with the "nadir" channel, which looks straight down) via a process called pansharpening. Pansharpening reduces the bandwidth necessary for color imaging, while not impacting the visual quality of the processed image.
However, pansharpening HRSC data struggles with water ice clouds and CO2 frosts (particularly when these features are thin). This is because they strongly reflect blue light, but are nearly transparent at redder wavelengths. The nadir channel's panchromatic filter primarily captures red wavelengths, blocking most blue light. The result is that clouds or frosts appear as bluish discolorations in pansharpened data, when they should have a more hazy or even solid appearance.
To create a slightly more realistic impression of the clouds, I use image differencing to isolate the signal originating from clouds, which I then add to the nadir channel data to increase their visibility to a reasonable level. This tutorial will use data collected during Mars Express' 5,153rd orbit (specifically the images h5153_0000_bl3.img, h5153_0000_gr3.img, h5153_0000_ir3.img, and h5153_0000_nd3.img), when HRSC captured some cirrus clouds over the Tharsis region. These images are already calibrated and map-projected, so we can generally avoid the process of ensuring exposure values are consistent and all features are aligned when assembling the color image.
This tutorial uses Photoshop CC, but uses features present in most photo editing software.
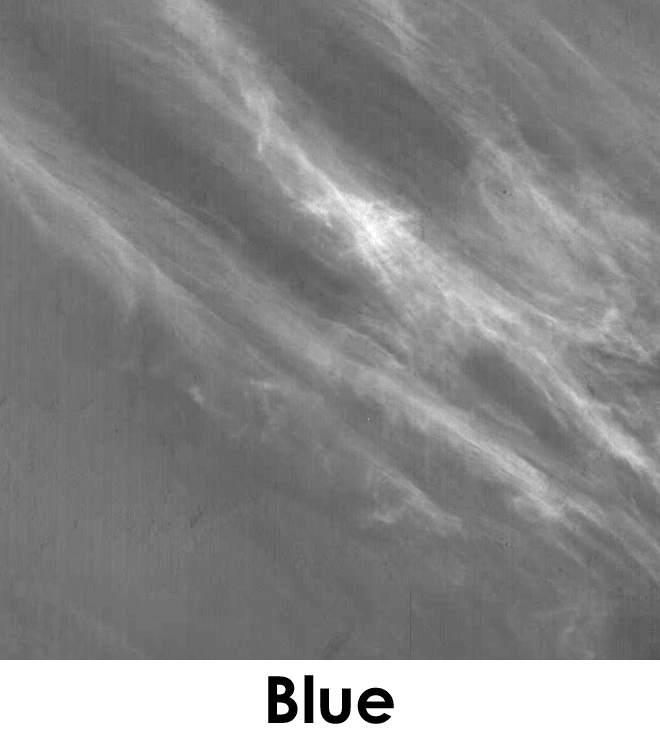
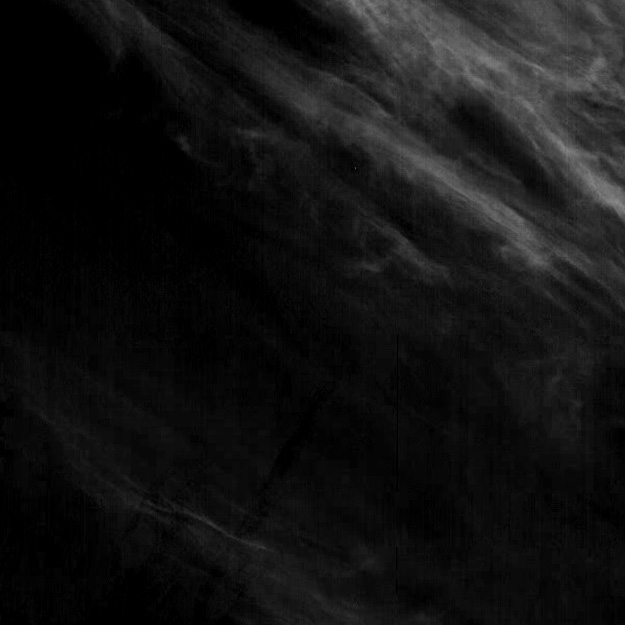
Here's a quick look at how the appearance of cirrus clouds changes when looking at different wavelengths. You can see the clouds are nearly entirely transparent at infrared wavelengths. You might also notice that the clouds are moving - that's parallax caused by the slightly different pointing directions of each color sensor. It's something we'll deal with a little later on.
Our first step is to isolate the signal from the clouds by subtraction. We'll use the infrared image as a reference, and the blue image as the source. I am using subtraction because differencing will include dark surface features in addition to clouds because of the the higher surface contrast at infrared wavelengths. Select the infrared image, and copy it into a new layer on the blue image. From the gif above, we can see that the surface is brighter at red wavelengths than blue wavelengths (which makes sense, Mars is red!), so subtracting before making any adjustments will remove a lot of our signal!
We'll match the brightness of the bright surfaces in the infrared and cloud-free areas blue images with one another. A brightness adjustment of -65 gets close. Next, set the blending mode of the infrared image "subtract", make a layer copy of the blue image, and merge the infrared and copied blue images together. The resulting image should look like this:
As you can see, the subtraction isn't perfect - we can still see some evidence of surface markings. That being said, changes due to surface markings shouldn't introduce as many artifacts at later stages of processing. Lighter areas are now consistently lighter in the subtracted image, but darker areas do not also appear lighter as they would in a differenced image. You'll also notice that the image looks kind of stripey. This is an artifact of how HRSC's sensors operate. In addition, we can that the subtraction enhances blockiness arising from the compression algorithms applied to the data. This is a good time to attack these artifacts with your favorite noise reduction techniques (anisotropic filtering in G'MIC is useful here), but for the purposes of this tutorial we're going to just apply a simple 1.5px gaussian blur.
Let's open our nadir image and take a look at the image size. We can see that it is 6134 X 65780 in size. The blue image is 767 x 8223 in size - it has been downscaled to 1/8 resolution. Small-scale details were permanently lost when this downscaling occurred. This will make the clouds look a little bit blurry when we add them to the nadir image. Rescale the blue image to the resolution of the nadir image, then copy it into a new layer on the nadir image.
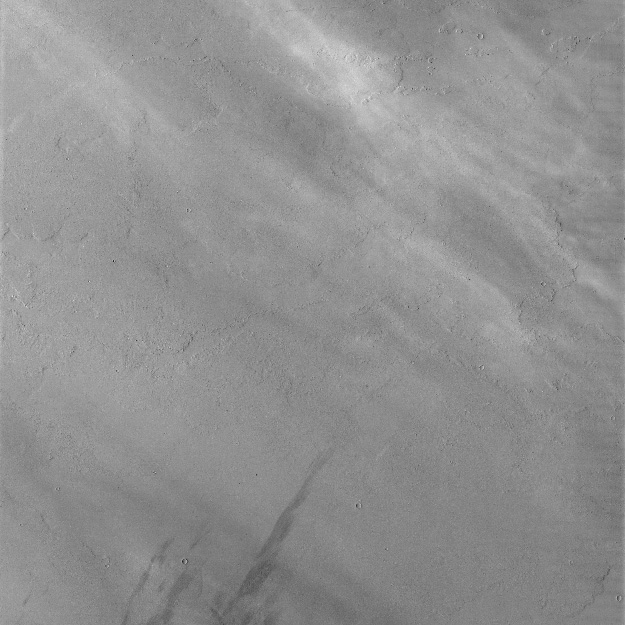
Set the blending mode to "Linear Dodge (Add)". This simply adds the DN value of the nadir image and the DN value of the subtracted image. The results should look something like this:
Some large areas of the cloud may look burned out. Those regions are where the addition reached the maximum brightness value possible, causing us to lose information. To fix this, simply reduce the brightness of the cloud layer until the details return.
At this point, I set the opacity of the subtracted layer to 60%. Here's my reasoning: when we add the subtracted image to the nadir image, we are effectively saying that the clouds' brightness in the blue channel is the same across the entire visible spectrum. In reality, the clouds show a diminishing brightness contribution in the redder parts of the visible spectrum. If we had a true panchromatic photo covering the entire visible spectrum, we would see that the clouds are brighter and thicker than they appear in the nadir image, but not quite as bright and thick as they appear in the blue image. I'll be honest and say that 60% is an arbitrary value, but it's one that I've settled on as a compromise between visibility and accuracy. I don't think it is too far off the mark after comparing with Viking imagery I've worked on but your mileage may vary. Play around with it yourself and use your own judgement.
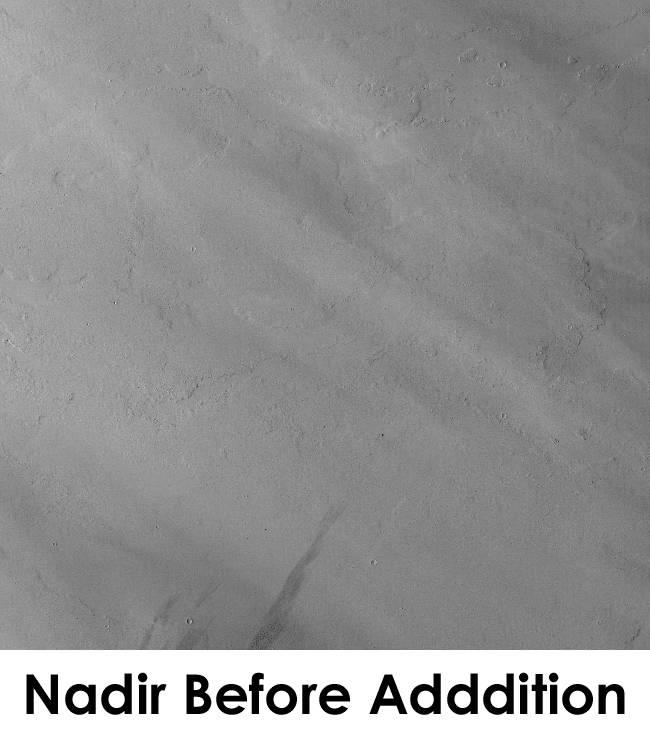
At this point, your panchromatic image should look something like this:
Now merge the subtracted image with the nadir image.
If we try to create a color image using the blue, green, and infrared channels, we get a rainbow effect:
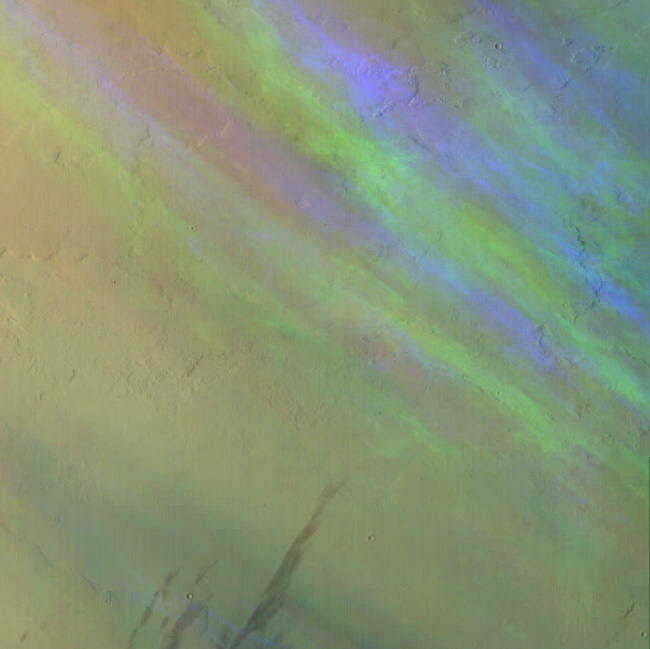
This is because of the parallax we saw earlier! Their position in the blue image makes a bright blue area, the green image makes a somewhat less bright green area, and the red image has a slightly redder area. If the clouds remained in the same spot, they would appear as a blue-gray color.
To get around the parallax issue, we're going to discard the existing green image and create our own. If you've read my tutorial on creating synthetic color channels by interpolation you know we can make a reasonable facsimile of a color by interpolating between two existing channels. Let's have a look at the HRSC filter response.
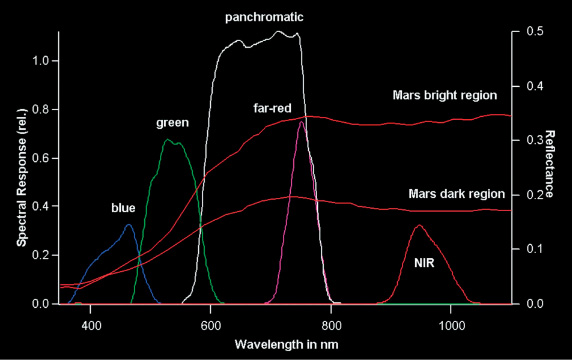
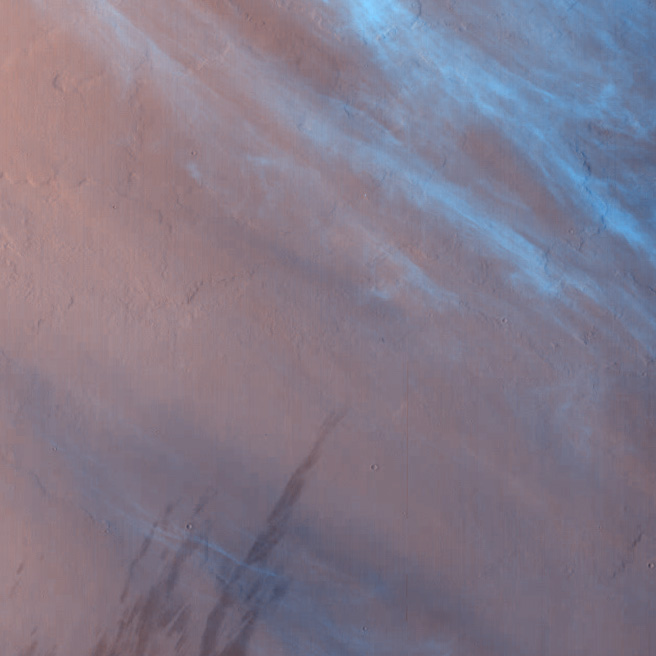
HRSC's blue channel is centered around 470 nm, and its infrared channel is centered around 900 nm. However, we can get away with pretending that the infrared filter is actually a visible red filter because the relative brightness and contrast of Mars' surface don't change very much in the infrared (wavelengths > 700 nm). So we'll make a green filter with an approximate band center at 550 nm, using the blue filter's 470 nm band center and the infrared (pretend red) filter with a band center at 680 nm (where the Martian spectrum begins to flatten out). We need to apply a weighted average that gives us a blend approximating a green filter at 550 nm and a red filter at 680 nm. Doing some quick math, this tells us we need a 60-40 blend of the blue and infrared filters to make a synthetic green. Here's the resulting color image:
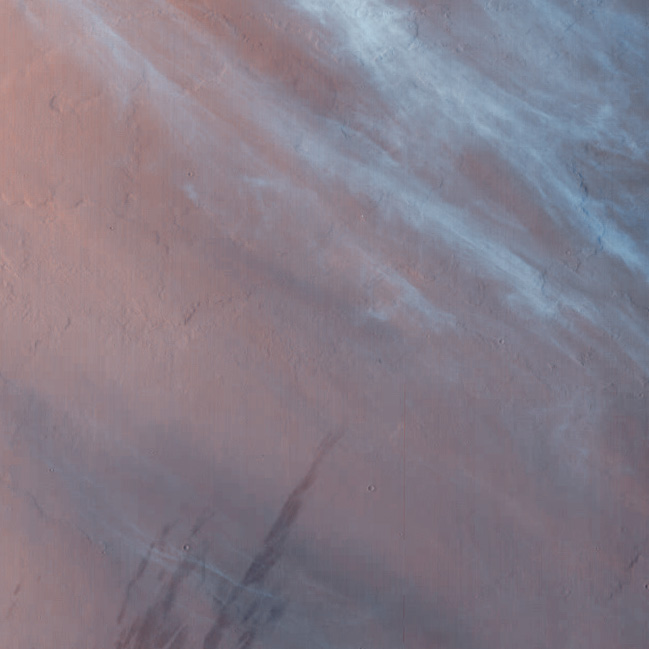
The resulting clouds are a very bright blue color - probably a little bit too blue. At this point I use the "Replace Color" tool to select the clouds and reduce the saturation by about 20, so that the clouds look like this:
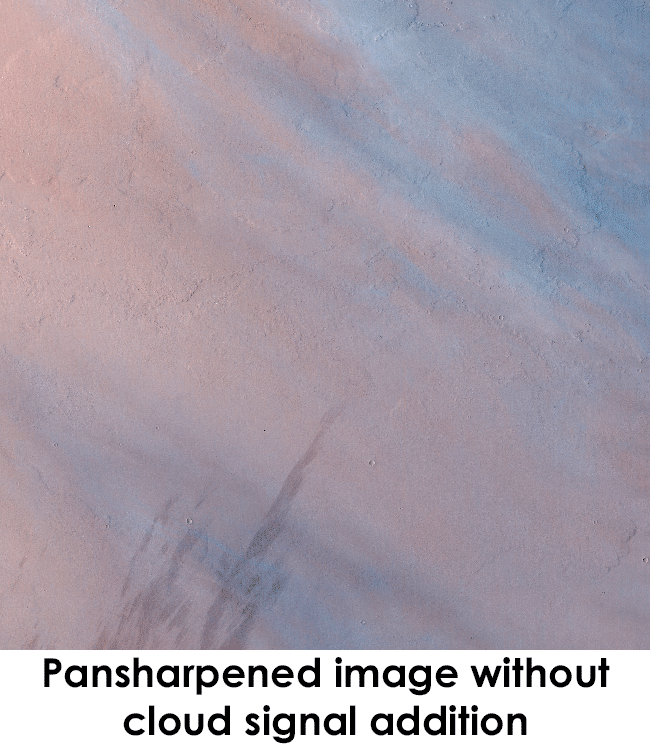
Now that we have a color image, it's time to pansharpen it. Resize the color photo to the size of the modified nadir photo we created earlier (6134 x 65780 px), and then copy it into a new layer on the modified nadir image. Set the blending mode to color, and you have the final full-resolution image. Here's what the pansharpened color image looks like with and without the added clouds:
The process is more or less the same for images containing surface frosts, except you can skip the step where you need to create a synthetic green filter. Since the frost is a surface feature, it shouldn't be greatly affected by parallax. A good image set to experiment with was taken during Mars Express' 10,743rd orbit of Mars. Here's a result I got for comparison.